Thursday, January 10, 2008

1/72 Italeri Mig-29 UB part 2

Here is some progress from last weekend and bit during the week. I thought it might be a good idea to crazy glue some weight into the nose to keep her from being a "tail sitter".
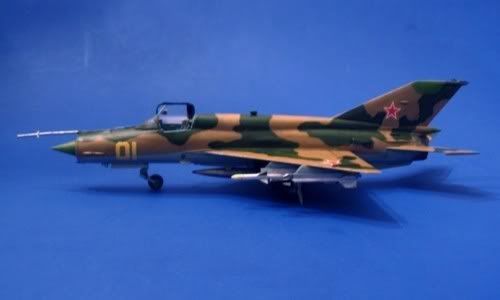
After putting the two halves together I noticed a raised seam just behind the cockpit. At first I thought it was a panel line but it is in fact a mold line. It does sort of follow a panel line but it goes right across fuselage in places where no panel line should be. I checked the bottom and the same seem is there too. Fortunately it is not too difficult to get rid of. I just found it rather odd.


Next comes the tedious work of filling gaps and seams. I've used Tamiya putty and a fair bit of sanding. Some panel lines had to be rescribed after.

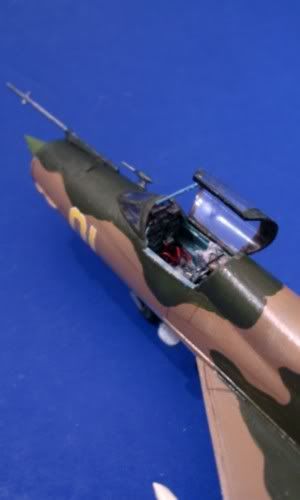
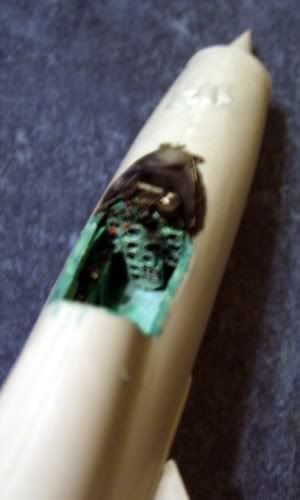
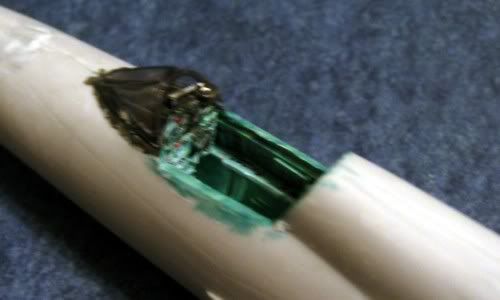
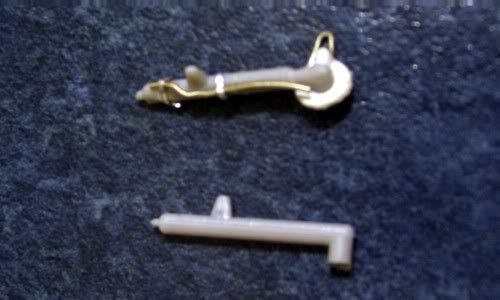
As an added touch for the canopy I build some review mirrors. I cut short lengths of plastic stip, rounded off the corners and glued a short piece of plastic rod. To keep the little pieces in place I've used a loop of Tamiya tape on a popsicle stick - used this for painting too. I painted the mirrors black then silver where the mirror would be.

Notice that the rod is a little long - this was just for ease of assembly. I trimmed them down before gluing them in place. I also painted the inside canopy frame. I brush painted rather than masking and airbrushing.

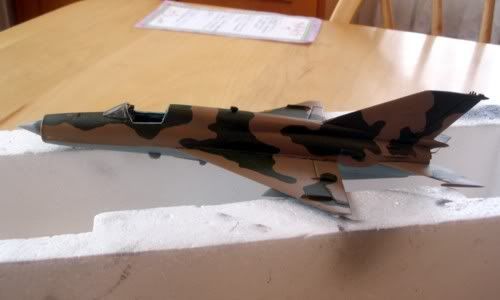
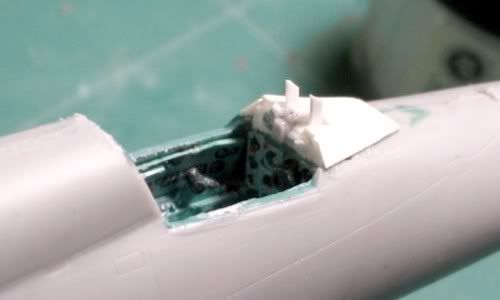
In this shot you can just see the mirrors. I think they add a nice touch. I also added what I believe is a hood for the pilot. On some Mig-29s this is blue but photos of the plane I'm doing show it to be grey. This was replicated with plastic strip.

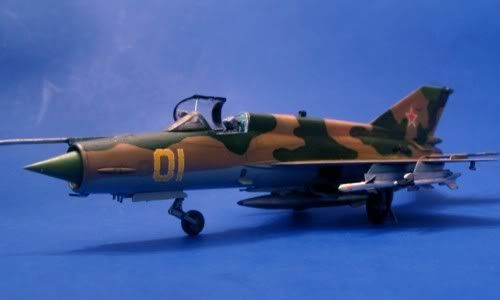
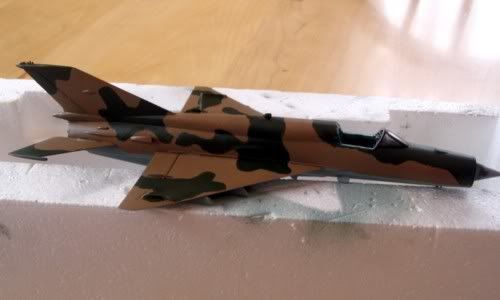
Masked off and ready for painting.

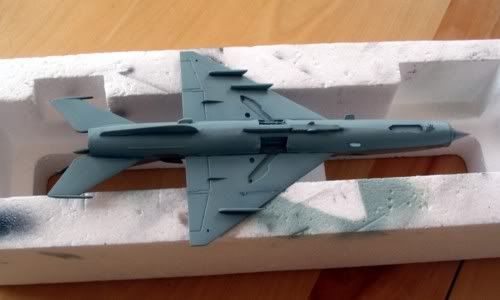
I was thinking that with the wings and tail fins in place I was ready for painting but I forgot about the intakes! Italeri renders these as two parts. Unfortunately the two halves don't join together snuggly on their own which made test fitting a little tricky. However I could see that some filling and sanding would be inevitable.

What I ended up doing was to glue one half down and line it up with the engines then glue the other half down. I still had to play around to get the best join but as you can see the is still some clean-up work to do.
The worst part is the front of the intakes which didn't line up very well at all. On top of this I goofed and glued the intake doors. I should have left them off for sanding and filling. I think I might make some covers with aluminum foil. This will cover up some of the problems and might look neat on a static model anyway.
I put the nozzles together while I was waiting for things to dry. They are not bad looking but I don't believe they are correct for a Mig-29 on the ground. Oh well I'm not going to go nuts correcting that.

GB

Friday, January 4, 2008

The First of 2008 - Mig-29 UB

I ended 2007 with some Mig-madness and I don't seem to have shaken it yet. So here we go with my first build of 2008 - a Mig-29 UB. The model will represent a Slovakian Mig-29 UB in a special tiger stripe scheme. I saw pictures of this plane on Airliners.net since then I've had this project in mind. The model is by Italeri and looks pretty decent. This isn't going to be a huge super-detailing project. Rather this is something to start the year off. Having said that I did have to do some work in the cockpit.

Italeri's cockpit is not bad and the K-36 ejection seats are quite passable. However there is no side-wall detail and there are some gaps that are visible even with the canopy closed. First off I glued some thin plastic sheet to close off the rear walls of the front and rear cockpits.

I added some simple details to the left and right walls - again not super-detailing, just to imply the busy front office of a modern jet.

The tub sides were extended with wedges of platic sheet. Some fiddling was required to get the right fit there.

No modifications were made to the control panels. Everything was given a coat of dark grey and dry brushed with light grey. Bezels and other details were picked out with black and highlighted with black.

A bit of gun-metal was also applied to simulate wear.

As I mentioned the K-36 seats are actually pretty good but there's room for improvement. Using a Verlinden resin seat as reference I add some details such as arm rests with scrap platic and simulated rivets with drops of superglue applied with a toothpick. I left the molded on seatbelts and added belts made of Evergreen plastic strip with I bent and twisted with my fingers then glued in place. At first I thought of usinging flatened out solder wire with wire buckles but that would be over-doing it for this project. For the buckles I just used small rectangles cut from the platic strip. Finally I added release handles made by bending fine wire around a needle nose pliers finished off with a bend in the middle. Once they were painted up I thought they looked pretty good.


Once everything was glued in place I tested the fit of the hull halves and had to shave the bottom corners of the tub. There are still some gaps that have to be dealt with but they were there even with out the cockpit in place. Everywhere else the fit is right on.


Next up will be putting the halves together with some filling and sanding.

GB

Monday, December 31, 2007

A Year in Models - 2007 Review


Here is the list from left to right/top to bottom:

Brunswick Hussar in British Service - 54mm Valiant (January)
Swiss Grenadier, 1812 - 54mm Ares conversion (March)
Don Cossack, 1812 - 54mm Airfix conversion (March)
Mig-21 F-13, "VPAAF" - 1/72 Airfix (April)
Eldar Farseer - 30mm Games Workshop (April)
Argive Hoplite - 54mm Romeo (May)
Russian Artillery Officer, 1812 (August)
F-14A Tomcat, Sundowners "Miss Molly" - 1/48 Revell/Monogram (August)
Cuchulainn - 54mm Elite conversion (October)
Brunswick 1st Line Btn NCO w/ Standard at Quatre Bras - 54mm Puchala (October)
Eldar Harlequins - 30mm Games Workshop (November)
Mig-21bis-SAU, Soviet Air Force, 1989, - 1/72 Eastern Express (December)

Looking back 2007 was a fairly successful year for me modelling-wise. I actually forgot that some of these were completed this year.

GB

Sunday, December 30, 2007

1/72 Eastern Express Mig-21bis pt.3

The Mig is done. I did my best to bring out the panel lines with a black-brown mix of acrylic paint. The panel lines were very fine and it was hard to see them, especially in the green areas where the paint was three layers deep. I would usually do weathering after a light coat of Future and with the decals in place but because the panel lines were so fine I was worried I'd lose them altogether. I tried to add some hightlights and tonal variations with Citadel acrylic paints as well. The green was highlighted with Jungle Green and the Tan with Elf Flesh. I gave the model a coat of Future floor wax and once that was dried the decals went on. Then it was a matter of finishing off all the little details - pitot, missiles, landing gear, bay doors, canopy etc. Btw the canopy had gotten mucked up during the build and I used toothpaste as a polish. I've read about this a couple of places and y'know what? It really works!

I have to admit the finished product has its fair share of flaws and quite frankly it looks better from a distance. However, when I'm building I like to concentrate on certain areas to try out new techniques. On this build it was the cockpit and gear bays and I'm pretty pleased with how they turned out. There's always room for improvement and I there's lots I can take away from this project for the next. So all in all I'm pleased with the results.

Click on the thumbnails for a larger image.


One more Mig-21 for the collection!


GB

1/72 Eastern Express Mig-21bis pt.2

Into the paintshop now. After pre-shading the panel lines the basic camouflage and underside colours were sprayed on. I used Model Master Dark Tan (1742), Dark Green (1710) and Russian Underside (2123) + White. I experimented with a liquid mask but I wasn't happy with the results. I ended up smoothing out the edges with a brush.

Click on the thumbnails for a larger image.


GB

Saturday, December 15, 2007

1/72 Eastern Express Mig-21bis

I started this one in November for a group build on Aeroscale. I have a thing for Russian subjects - I don't know why. This is a 1/72 Eastern Express Mig-21bis which I believe is a re-box of the KP kit. I have both and they look pretty darn similar. The canopy in the EE kit comes in two parts however, unlike the single piece canopy in the KP offering. The model is pretty sparse in the cockpit and wheel-well areas so I tried to jazz them up. The cockpit is totally rebuilt from plastic card with a True Details KM-1 ejection seat added. The landing gear bays were improved with plastic rod and various thickness of wire. I also improved the struts with some wire and card. Some of the intakes looked a little large so I replaced two with hollow solder wire and sanded down the others. At this point I'm about ready to start masking and painting.


Click on the thumbnails for a larger image.

GB

Saturday, October 27, 2007

The Long Lost Update

I should try to update this blog more often. I have completed quite a few projects since my last post and here they are.

First up is the completed CĂșchulainn which I started back in July.


Next is a 54mm by Puchala Miniatures representing the Brunswick 1st Line Battalion's standard at Quatre Bras/Waterloo. The figure is pretty nice for an older miniature.


I am also trying to finish a troop of Games Workshop Harlequins this is the second of five.


Finally here is a Durendal 54mm of one Napoleon's Dutch Lancer Offices in "morning" dress. This is a really nice figure with excellent fit and minimal mold lines.


GB